Friday, November 27, 2015

Oakberry Graduation Shawl


As full a view as I could get, plus one of the darling little acorns on the sides.  Knitter details on how to modify it to make the colourwork yourself are here.  Less knitterly details are here.

A couple months ago I stumbled upon the Oakberry shawl pattern by Carol Sunday.  It was so beautiful that I, who had never bought a pattern on Ravelry before in my 6 years of membership, did not hesitate to add it to my cart and checkout.  When I saw it, I immediately saw two things: the shawl in colour and me wearing it at my graduation in December.  Why?  Because it screamed "ENVIRONMENTAL SCIENCE" to me.  It fit perfectly with my degree.  I will be graduating with a Bachelor of Science in Environmental Science and have been conducting microbial ecology research for two and a half years now, so it seemed a perfect pattern to symbolize my whole undergraduate career.  The shawl has nature, and the oak tree is crawling with microbial symbionts and parasites, and is part of a complex ecology in which it plays a key role.  It is also a robust, noble tree that is often used for ancient and current symbols, and the delicate lace border fits in with these finer points.  The oak has travelled cultures and peoples, and because of its ecology interacts with more than just people as well, fitting in with my study abroad in the French Riviera last spring and my frequent travel to conferences to present my research and take in others' current research.  The shawl itself both has and symbolizes inherent strength and beauty.

Here you can see the contrast between the robust body and leaf panel and the delicate vintage border.

After buying the pattern, I had to figure out what yarn to use.  Years ago as a new crocheter, back when I was 13, my mom had checked out Doris Chan's Everyday Crochet from the local library.  I fell in love with her designs, style of design, and approach to design.  One of the patterns in there, a little vest, said that she loved the "unadulterated shades from O-Wool."  I did not like the colour combo in the vest, but I loved the colours themselves, and their crisp, bold outline.  I found O-Wool yarns a few years later, but it was online and I was under 18.  When I finally did get to order something, I fell in love with O-Wool.  I hate fuzzy, halo-y yarns, and O-Wool, so far, has had none of that, even their merino.  Jocelyn Tunney's yarn was even more in my mind because I had just purchased Pompom Quarterly's Autumn 2015 issue just because I had fallen in love with the Magdalen scarf on the cover, which looked like it was made in bulky, cozy yarn- but it was O-Wool.  I knew I wanted something rich in colour and very solid and sturdy, so I went hunting for O-Wool.  I ordered 3 skeins each of Cypress (green) and Earth (brown), and after they arrived I went to my LYS and picked up some Juniper Farm Moonshine (40% Alpaca, 40% Wool, 20% Silk) in gold and Noro Silk Garden (45% Mohair, 45% Silk, 10% Wool) in a pale hunter green for the acorns. 

Oakberry took me 6 weeks of on and off knitting, from October 11 to November 27.  I looked up image after image after image of oak trees at different seasons to pick the yarn and colour, and even dyed the golden yellow yarn a deep gold to make the shade suitable for acorns.  As luck would have it, last week O-Wool announced the discontinuation of their Legacy DK yarn line.  I was worried about running short of brown, so I rushed to finish it in case I had to resort to scouring Ravelry destashes.  But I finished, and the sad, crumpled lace blocked out beautifully, as I knew it would.

And now I have a "but why should I block?" reference on hand.  For you non-fiber craft people, "blocking" is a very intense version of washing and laying flat to dry.  You basically stretch and pin the garment to its final shape.  Subsequent washes and reblockings will not get rid of this shape completely.
 
Oakberry took many reruns of Once Upon a Time, some Big Bang Theory, assorted BIGBANG music videos, and the Star Wars prequels (which I still hate, although with less intense fury than I did as a child).  On December 19, I will wear it with the pride I invested in it.

Wednesday, November 25, 2015

Poison Apple Pie


I meant to release this recipe Monday as a potential Thanksgiving or other kick-off-the-holidays treat, but I'm releasing it now.  If you know how to make pies and are good at them, this should be a quick little thing to whip up and bake.  If you don't, fear not.  Making them isn't hard- prep work will take about an hour the first time, but if you follow all instructions and grab some helpers, it'll be fun and it will still taste great.  You can also cut a lot of the effort if you buy one of those premade pie shells.  You'll still have to make the top crust, but it's WORTH it.  If you DO know how to make pies, this one's a little different.  I'm not a lover of the traditional flaky crust as used in most baking traditions.  I'm used to Mexican pie crusts, which are sometimes flaky and sometimes crunchy.  Since I taught myself to make pies when I was 10, I often got lazy and cheated, or did something to cut my cooking time, which resulted in my finding out how to make a crunchy crust.  It is also how I invented this pie recipe, because I tried out 3 apple pie recipes and they all tasted so store-bought.  Until this.  For the crunchy crust, you use melted butter instead of cold butter or shortening.  And you can mix the leftovers with cheese and make crackers!  With cheddar, it's homemade cheez-its!
Figure 2: I apologize for the poor-quality photo.  It was, of course, still delicious.

So, how is this apple pie different?  It still has airs of the traditional, of course.  It has the look, the cinnamon (a LOT of cinnamon), and it's delicious.  The difference is my addition of cranberry juice.  It HAS to be cranberry juice.  It can be a blend, but it must be cranberry juice.  I've used grape and apple juice, and the taste is not as satisfying.  I've used cranberry apple, cranberry, and cranberry grape juice with success.  Make sure it's natural juice.  Ocean Spray is okay, as is Sam's Choice.  Langer's can be iffy, for whatever reason.  Sometimes I add walnuts or pecans, maybe some pear or a handful of blueberries.  The choice is yours!  (Note: For a tasty pear pie, follow the recipe, but replace apple with pear and the cranberry juice with apple juice or just a splash of water.)  For a diabetic-friendly recipe, Ocean Spray carries some sugar-free cranberry juice, and I substitute Splenda for the sugar.
Figure 3: Layering on the top crust!

General pie-making tips:
  • If making your own crust, you NEED to pre-bake it for 10-15 minutes.  If you do not, it will be gooey.  Ask me how I know.
  • When adhering the top crust to the bottom crust, coating the edges with water first works wonders.
  • After you've adhered the top crust, you do have to make those cuts at the top you always see in pies.  If you don't, steam cannot escape the pie, and it will boil over, possibly destroy the crust, and make a mess.  Ask me how I know.
  • When baking a pie, place pie on a cookie sheet to bake.  Sometimes the filling boils over from the edges, and you don't want it all over your oven.
  • I don't recommend a lattice crust.  It looks pretty, but for this pie, most of the flavour is gone.
  • If you melt the butter like I do for my crust, you will get a crunchy crust.  If not, or you use shortening, you will get the traditional flaky crust.
  • I use barely enough sugar to sweeten the pie.  If you like it sweet, just double that amount.
  • When kneading the crust, it's easiest to split it in two, one for each crust, smash a flattened circle down on a floured surface, and knead center out.  
  • I chop my apples instead of slicing.  I feel it not only gives more fruit in the pie, but that the flavour also packs in better.
  • If your apples aren't great to eat alone, they'll cook just fine.  If you mix apple types, it's fine.  If they're bruised, it's fine.  It's all fine. 
  • Take a deep breath.  Turn on some music.  Have fun. :3
Figure 4: Cut where the red is to allow pressure to escape the pie.

------------------------------------------------------------------------------------------------
Print Friendly and PDF
Poison Apple Pie makes one 9-inch deep dish pie
 
Crust
2 cups flour
1 stick melted butter
1/2 cup milk or cool water

Preheat oven to 450˚ F.  In medium bowl, sift flour.  Pour in melted butter and mix with spoon.  When no longer hot, mix with hands until evenly mixed.  Pour in milk or water, and knead again with hands.  Dough should be smooth and not sticky, but still pliable and easy to work with.  Knead for 2-5 minutes, then split in half.  Set one half aside for later.  Flatten second half on clean, floured surface, flour rolling pin, and knead from center out to a ~12-inch circle about 1/4 inch thick.  To check if your crust is big enough, hold your pie pan over the dough center.  Edges of dough should just peer out over pie pan.  When suitable size, lift and transfer crust to pie plate, folding edges over.  Wet the sides of the crust and flatten with fork, then trim the leftover edges with knife or kitchen scissors- like Figure 4, but with bottom crust.  Pierce bottom of shell with fork, then bake for 10-15 minutes.  You can freeze it after it cools.

Filling
3-4 cups apples, chopped, cored but with skin still on
1/4 cup sugar (this will make the pie barely sweet, if you like it traditionally sweet use 1/3 cup)
1/4 cup all-purpose unbleached flour
2 teaspoons cinnamon
1 teaspoon ground cloves (optional, just adds depth to the flavour)
1/2 cup cranberry juice

Preheat oven to 375˚F.  Place apples in small bowl.  If you're not sure if they are enough or too much, I often place them in my pie shell to check.  Add dry ingredients and mix well, then add cranberry juice and mix well again.  Pour filling into pie shell, roll out top crust to circumference at leash 0.5 inches larger around than that of your pie pan.  Crust should be ~1/4 inch thick.  Wet edges of pie with water and press down with thumb and forefinger, then again with a fork (Figure 4).  Don't worry if it's not perfect, it will still taste perfect.  In center of pie crust, slice 4 or 5 holes in the shape of a star to let steam escape during baking.  After that, trim the edges, cover pie edges with foil, and bake for 30 mins.  After 30 mins, remove foil and bake for 35 mins.  Let cool at least a half hour, then enjoy!

Monday, August 10, 2015

My First MKAL (Corinthian Order) is over!


WOW.  I knew that I was insane when I decided to turn a modification of a lace stitch into its own, totally unique lace stitch, and moreso when I decided to turn it into a full-length shawl with 3 shapes.  Then I decided that instead of pattern testing, I'd knit 2 more prototypes (self-testing) and then start an MKAL, Corinthian Order, after ironing out as many issues as possible.  And now, it's over, and there are 4 downloads to choose from: a master file with all the shape options, and a file each for the stole/rectangular, triangular, and crescent options.  I would highly recommend those new to shawls to download the master file so you have all the options before you.  But, if you already KNOW which shape you want to knit, you should know that each download is indeed prefaced with basic pattern information (materials, gauge, options), introduction to shawl shaping, and introduction to shawl chart setup, and each download is also ended with some lace blocking instructions and a link to lace blocking instructions with pictures.

I have learned so much from hosting this.  I have done pattern testing before, twice, and I have taken part in MKALs.  Sometimes I would get irritated when a designer put out several updates of a pattern in the same week or even day, but I knew and acknowledged that it was necessary because of the nature of MKALs, of which I usually lag a week behind or have been tested in some places.  But I've never had to be on beck and call for a pattern I've designed, or realized just HOW MUCH slips through your self-testing process when you need to help 5 people with the same question/issue, or with 5 different questions/issues. 

Now, I would share my finished pattern, but I have not taken good photos of my 2 finished prototypes, and the final project, which is the exact one in the final published pattern, has guiltily been abandoned halfway through the final clue because of all the design mods it went through!  Speaking of design mods, I once again have to beg forgiveness and also extra thank the crescent shape knitters, as that is the only shape I did not test fully, and it showed.  I made so many silly, stupid mistakes on those charts, yet people caught them and reported them within a couple days of each clue release, and no one cursed my name nor the ground I tread on, as far as I know.

Wednesday, July 29, 2015

Farmer's Market Recipe: Chocolate Pasta with Pecan-Squash Pesto and Sausage (savoury)

 A dish summery in appearance, with autumn flavours

Sometimes, when you go to the Farmer’s Market, an ethnic grocery store, or an organic store, you buy something really unusual, whether because it interested you, morbid curiosity, or just ‘cause. This post is borne of such a buy: chocolate linguine from a pasta stall I’ve purchased before. I have been interested in the chocolate pasta since I “discovered” a woman selling Pappardelle’s pasta back in March. I bought this chocolate linguini two Sundays ago, but since March I have purchased portobello mushroom pasta, four peppercorn, sundried tomato linguini, and lemon parsley. None of these have disappointed me, and in all of these pastas, the flavour just POPS. I mean, that mushroom pasta tasted like pure mushrooms, and I, a person who is not fond of plain pasta, wanted to eat it all by itself!

Sliced squash.  Sorry for no whole photo- but just make it a mission to find an unusual squash!

I took all the photos on my phone (sorry!) and did not photograph the squash before slicing.  So, for this recipe, make it your mission to find unusual squash and pasta, or use it as a starting point for your own ideas!  Chocolate in food wasn't that strange to me, being Mexican, and being from a family that loves cooking, I know how to handle a challenge.  For this meal, I was unsure how the pasta would taste, but I knew that squash would go well whether I went for savoury, sweet, or any other flavour, and the weird squash pile in the farmer's market caught my eye.  I cooked the pasta first to decide how I would make it, and decided that the pure cacao flavour would be muted or even killed if I made the creamy sauce I had been planning on.  I still wanted simple, so I went for a fresh little pesto with squash, and some pecans to complement the pasta. I left the pesto more textured than most I've seen, to keep some of the original flavour of the components.

Don't blend the pesto to a perfect smoothness

I would totally buy this pasta and this squash again.  This dish would be a perfect side to some pork roasted with white wine vinegar, or other simply cooked but still decadent fare.  I would also like to taste it with slices of brie, added in the last 5 minutes of cooking.  I thought of adding parmesan, but the strong flavour would overtake the subtleties of the squash and chocolate.  My short time in France last year did teach me that- pungent and flavourful is not the only way!  "Simple" flavours go a long way indeed.

Print Friendly and PDF
Savoury Chocolate Pasta with Pecan-Squash Pesto and Sausage
Serves 4 

3/4 pounds/340 grams chocolate linguine pasta*, al dente
1 tbspn butter
1 garlice clove, minced
2 medium squash, sliced thickly, of any variety! I didn’t get the name of the squash I used, I just picked two because they looked interesting. You could use 1 butternut squash or a medium-sized yellow pumpkin if your options are limited.
sprinkle of dried rosemary
1 tbspn balsamic vinegar
3 large bratwurst sausages, sliced
pepper to taste

Pesto:
1/4 cup pecans
1/3 cup olive oil
4 large slices of squash, about half a small squash or a quarter of a medium pumpkin
4 fresh mint leaves, large
2 fresh basil leaves
dash of fennel
sprinkle of pepper
sprinkle of salt

*I got mine from the farmer’s market. The company was Pappardelle’s and they are available at some localities throughout the USA, usually at farmer’s markets and local festivals.

In a large pan, melt butter to just past melted, add in the minced garlic, and cook on medium until golden. Add in sliced squash, sprinkle with rosemary, and cook on medium for about 4 minutes. After 4 minutes, stir and add in the balsamic vinegar, followed immediately by the sliced sausage. Sprinkle with pepper and salt, stir, and allow to cook covered on medium until sausage is just done, stirring occasionally. Uncover and raise heat slightly, and cook until squash begins to blacken.

While the squash and sausage are cooking, place all ingredients for the pesto in a food processor and blend until mostly smooth, but still a little textured. Heat some olive oil in a pan, and once hot, pour the pesto over so that it sizzles. Cook the pesto on medium heat until it changes colour, adding splashes of olive oil if it starts to get too dry. Add pasta and stir well, until evenly coated. Cook 5 minutes on medium-high heat, uncovered and stirring often.

Serve pasta and squash-sausage dish either apart with a salad or yummy bread, or mix the squash and sausage with the pasta and serve together as a side to a main dish.

Enjoy!

Saturday, July 25, 2015

Natural Dye Day: Saffron and Pecan Shells Recipe and Tutorial

  
 The same skein, dyed with pecan shells, under 2 different light sources, artificial and natural.  Both are accurate- the vibrancy dye from pecan shells is very sensitive to light, but thus far the skein has NOT faded in any way. 

Okay, so I had a previous post about natural dyeing, about lemongrass. I had also written one earlier this year about pecan shells, but the mobile app lost it all and I couldn't be bothered to retype it all.  Which is really a shame, because it also held my thoughts about having just gotten into spinning a couple weeks prior, and I wanted that to reflect on. 

So again, here we go; dyeing with pecan shells. SHELLS. Not the husks, as you may have seen on natural dye lists. When  I did this, I could find nothing on dyeing with pecan shells, anywhere. The one reference to it I found online was someone saying that you dye with pecan husks, not pecan shells, and that the shells should be expected to have no colour. But I know nature holds numerous surprises, and that chemistry of pigmentation, like all chemistry, is complicated.  So I ignored that post, and set pecan shells to boil, expecting a clear brown colour but knowing that there night be a surprise. And there was. I got a strong, somewhat clear pinkish brown, or dusky rose.  And I dyed superwash combed top with it, and it was beautiful. 

Today, I did not dye with pecan shells, but I did extract the dye from them to make sure that first time had not been a fluke.

But anyway, if you want to know my process for dyeing with pecan shells, it's pretty straightforward and works like any acid dyeing process for protein fibers such as wool and alpaca.  If you already have a good dye process, extracting the dye from toasted pecan shells is in steps 2a and 2b. If you are still exploring, feel free to read the whole tutorial and use what works for you! 

Print Friendly and PDF
Dye Process/Tips: 1)  I let my yarn soak in vinegar overnight.  Not too much and not measured, just what is maybe about 1/4 cup/6 cL of vinegar in a little tub of maybe a liter and a half of water?  Whatever your usual acid concentration is.  I let this soak overnight, because I usually do cold dyeing, and even if I don't I've just found that it helps colourfastness.  BUT, that's because when I don't cold dye it's because I get impatient with my cold dyeing process and hot dye midway through it. 
Skein of Berroco Folio doing an overnight vinegar soak in an old Nutella jar

2a) I extract the dye from the pecan shells with just a handful put into boiling water- the colour is very strong!  It's surprising, but you only need a small handful in a large pot to get a deep, intense colour.  My hands are tiny, and I've got 2 large pickle jars of dye stock solution now thanks to the pigment's intensity. 
February's dye pot of pecan shells.  Today's was much smaller.

2b) Double, double toil and trouble, fire burn, and cauldron bubble!  Basically, boil for a good long while- I do about 30 minutes, then simmer on low for 15 more.  Some people simmer longer to get all the pigments leached out into solution, some let the dye stock soak overnight for the same purpose.  I do the soak overnight.  I have stored the solutions both in a dark, cool drawer and in the refrigerator.  I do not know how long they can last in a cupboard, as the longest time I have kept dye stock solution tucked away without refrigeration is a month in winter.
3 extractions of pecan dye stock solution- told you it had a strong colour!  Left: No overnight soak, just boil 15 minutes and rest 30 minutes in the pot.  Middle: Boil 15 minutes, let simmer and 30-45 minutes, sit overnight, pour.  Left: Boil 15 minutes, let simmer 45 minutes, sit 1 hour, pour into jar.

3) To dye your fiber, plunge into a solution of the dye solution plus, if you need it, water- make the dye stronger than the colour you want in your yarn.  I usually pour my vinegar soak solution into my dye solution.  Make sure the solution is THE SAME TEMPERATURE as your vinegar soak is, unless you are using superwash or a yarn from a breed like Suffolk.  Even then I'd not shock the yarn.  If it is fiber, be extra gentle with it when you push it and squish it down to get totally soaked.

4) If you hot dye, perform your usual temperature process here.  If you haven't hot dyed before but want to, up the temperature slowly to just boiling and letting your yarn simmer for about an hour, then turn off the stove but leave over heat.  If using the microwave, let it sit there for an hour or so.  If you want to cold dye like me, I heat up the solution to just warm, then I cover and let my yarn or fiber sit there overnight. 

5) After the dye soak, rinse your yarn or fiber until the water runs clear.  For fiber, I put it in a large strainer and gentle run water over it indirectly, not directly.  I just let the water run over my hand and sprinkle it over my fiber, squeezing gently.  To quote Natalie Redding of Namaste Farms, what makes wools felt is detergent+temperature change+agitation.  Don't use soap yet, don't shock your fiber, and you may squeeze gentle so long as you don't manhandle it.  I swirl it, squeeze it, pull it, etc., but carefully. 

6) Once water runs clear, you can add your soap and rinse your yarn or fiber.  Remember to keep the water temperature constant, or to let it change steadily to prevent felting.  This step will make sure that there are no leftover smellsies on your precious hand-dyed yarn or fiber. 

7) Hang your yarn or fiber up to dry. 
Superwash merino fiber dyed with pecans, and the (newbie) yarn spun from it.  I splashed on food colouring at assorted points in the 75 grams of top. It spread and the pecan-only parts looked like they had disappeared, but upon spinning I was delighted to find that the food colouring did not penetrate all the way, and the finished yarn is mostly that pinkish brown tone from the pecan shells, with some spots of colour throughout.

Disclaimer: Remember, this is just how I dye with pecans.  You should find the process that works best for you, then extrapolate the portions you need from other people's tutorials, such as how to get the pecan shell dye out in mine, if you already have a dyeing process.  So long as your final product taught you something and/or is useable, no dye job is a failure!

Saffron dyeing:
This one is easier.  I happened upon some old, spilled saffron in our spice cabinet, and decided to use it.  I also happened upon http://www.reconstructinghistory.com/articles/irish-articles/dyeing-with-real-saffron.html, which told me that if I see somewhere that saffron is a fugitive dye, then the author was likely confusing saffron with safflower.  

I wanted to dye my Suffolk 3-ply yellow, so I put a pinch of saffron in a water bottle to make a saffron "tea", AKA saffron dye stock solution.  This is what it looked like at first:
  
...and then 2 minutes later:

WOW, right?  I knew the dye was supposed to leach out fast, but WOW.  The solution got darker, as I let it steep overnight, along with letting my handspun soak overnight in its vinegar bath, and then I poured some saffron stock solution into my container, swirled, let sit for an hour, got impatient, and so microwaved the yarn container for 10 minutes, then let dye for an hour and came back.  I did the water run clear and got this beauty:
 Same skein of yarn, different light sources.  The left is almost no light, the right is natural + artificial light.  In most lights it looks like the right.  It's very weird, but I like the effect.

Happy yarning!  Au revoir!~

Thursday, July 23, 2015

Tour de Fleece 2015 Challenge Day! Dyed locks and plying


Spun up on my Greensleeves Damsel Monique spindle to take the thicker, textured single

So, I accidentally missed the last Challenge Day of this Tour de Fleece because I wasn't paying too much attention to the schedule other than start and end dates.  This is also the first time I have participated, and I only heard of this a couple months ago since I just got into spinning this January, so I didn't know the structure.  I also actually adhered to the rest day on Tuesday, which was absolutely marvellous for my wrists, which are no longer aching constantly.

Anyway, my original challenge for the Challenge Day was to ply my Suffolk on my new The Dancing Goats supported spindle, which was somewhat cheating because I have plied on my other The Dancing Goats spindle, but it was my Navajo Churro fleece that I blogged about before.  Now that I think about it, it's actually quite fitting that the fleece I bought at the same time as the Navajo Churro also be plied on the same sort of spindle from the same maker.
Plying Suffolk fleece for gloves

And what a lovely surprise.  I hate plying, especially because my drop spindle gets sooo heavy, and plying Mirkwood was a huge factor in the week of wrist pain, so I had decided then and there that I would ply my next thing on a supported spindle.  But today, the plying was wonderfully painless, my wrists didn't snap or crack or ache at any point, and I was able to just put a notebook on the floor and stretch very little to flick the tip every now and then, wind on when there was enough twist, and repeat.  I want a very bouncy yarn, so I am plying to what looks just a tad bit overplied to me, then winding on.  It is remarkably even, and I can't wait to get to dyeing it.

Some of the Rambouillet locks I dyed and spun for this challenge day
, from different section of the fleece, and under different light sources to give a good idea of colour variation.

The second challenge I did came to me on the spur of the moment.  I had grabbed a couple handfuls of locks from my mass of Rambouillet fleece, and dyed them with some food colouring and espresso from used coffee beans, using vinegar as a mordant.  I did a cold dye as I usually do, after scouring my fleece to get out ALL the lanolin (I got most of the lanolin out in my initial wash and have been spinning in the grease).  I skimped out on the vinegar soak, leaving it only an hour instead of my usual overnight soak, and then dunked the locks and vinegar in the dye bath and left it outside for 36 hours.  The challenge portion came when I decided today that I was going to tailspin these locks, without further prep.  I love spinning from the lock, but I flick or comb the locks before going at it, unless they are super nice and fluffy already.  I have done a couple locks "proper" tailspun, as I think of it due to Natalie Redding's terminology, in which I just spin from the mass of locks without any prep, but I have done this only 2-4 times.  I did beat the locks before dyeing and after drying to get out as much remaining dust and vegetable matter (VM) as possible, but once that was done I decided, hey, it's Challenge Day, let's do a challenge!  So I did.  I decided to tailspin the locks, sans prep of any kind, and just let the locks be themselves.  Nepps, noily bits, second cuts, clumps, whatever, I let the fiber be itself and got a textured yarn, spun semi-worsted and semi-woolen: occasionally from the fold worsted style, but mostly right from the tail end in a woolen style.  The locks are wonderfully soft now, almost too soft, and I am afraid the finished yarn may bleed, so I will finish it in a proper vinegar bath.  Since I already have a super textured yarn from this, and not the texture I tend to gravitate too, I will I may just ply it with some silk plying thread and/or metallic threads that came with a scrapbox I bought from Namaste Farms.  I do wish I had something like bright blue to put in like thrums in the yarn, but I may get that yet!  I love what I'm getting so far.
 
And of course, I am still working on my MKAL.  The second clue is out following a slight revamping,  in which approximately 120 more beads that first stated will be needed for a more Corinthian-like column.  It will be lovely, and it's not too late to hop in!  Clue 2 is small to let people catch up, and there is a group for support and sharing progress.

Au revoir!

Saturday, July 18, 2015

First Dip into Natural Dyes- Lemongrass!

I've always wanted to try natural dying, since I first read instructions in the English textbook I had in first grade about how to dye a shirt various colours using different weeds.  I've tried the occasional coffee bath on my yarn, but it usually washed out.  I have since found out that it was because I ought to have let it soak for a while, after looking up countless tutorials and help pages for natural dyers.

What strengthened this interest so that I wanted to really do it this time?  Why, the beautiful patterns of Caitlin Ffrench, especially her Common Bean shawl.  That Common Bean finally made me decide- yes, I am going to try dyeing again, but seriously.  So when there was an oversteeped lemongrass tea sitting on my stove, I got out one of my beautiful skeins of naturally coloured Fyberspates Scrumptious Lace and got to work.

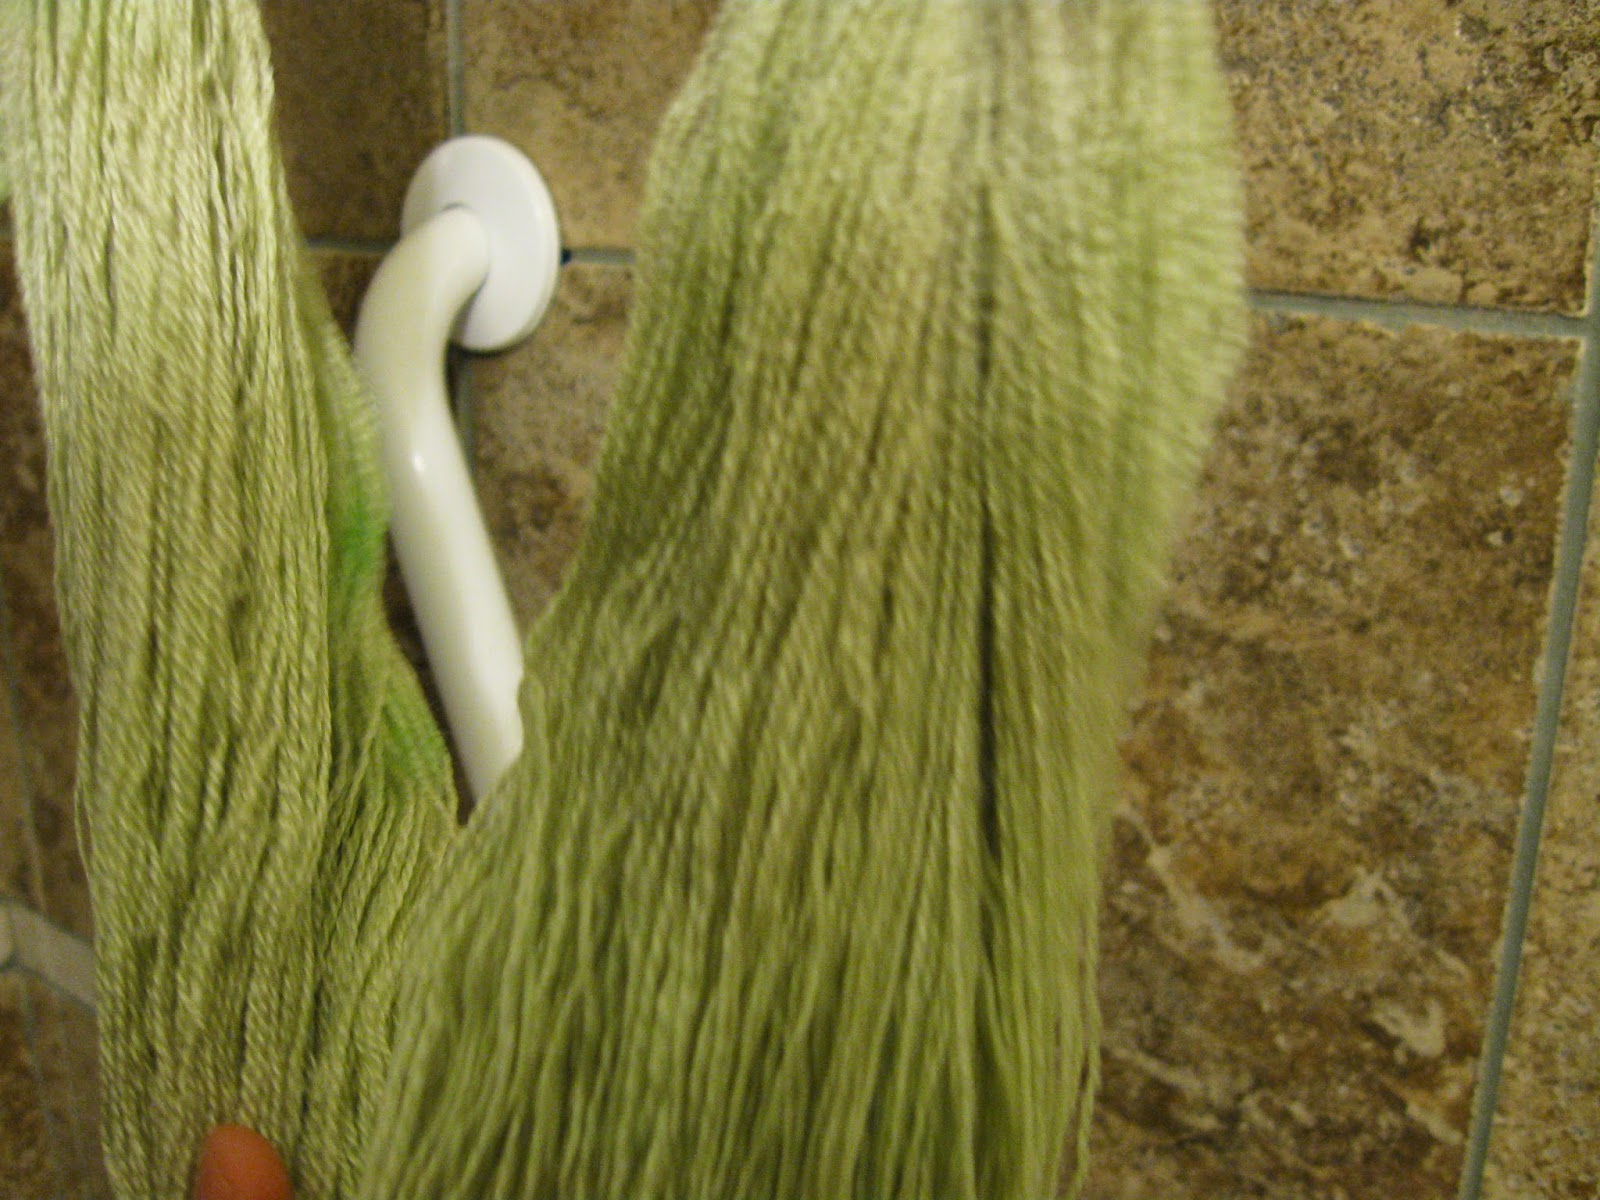
I followed all the instructions I'd read, but I was impatient.  I let it soak in a vinegar/water bath for an hour, then took it out and dunked it right in my wicked brew of lemongrass.  I splashed it a bit with green food colouring and some red right on the yarn so it had a mottled look, and but I now know I did not give it time to penetrate the fibers.  I threw some homemade jamaica concentrate into the mix as well, but it also did not soak in, likely due to the fact that I stewed for an hour before removing my yarn from heat, and washed it after another hour.

After taking my dyed yarn out of the pot, straining it in the shower (waaaay too messy and smelly for the kitchen sink), I squeezed it until it was just damp and hung it up in the shower to dry.  I loved the colour, but it seemed too light and I was afraid it would dry to be an off-white minty colour, which would still have been nice, but not what I wanted.  Nonetheless, my yarn took the lemongrass and green food colouring well, and the patchy bits of colour look quite nice to me.  Now I know for next time! 
www.ravelry.com/people/NekoPeque/stash/scrumptious-lace-2/
Lemongrass + 3 drops of green food colouring results: 
before drying (left) and after drying (right)


Friday, June 26, 2015

Corinthian Order: My First Lace Pattern, First Shawl Pattern, AND First MKAL!

http://www.ravelry.com/patterns/library/corinthian-order
Corinthian Order is a basic top-down shawl or stole available in triangular, crescent, and rectangular (stole/scarf) shapes.  The main body can be lace or stockinette, and can be a different colour than the border.
I am going to be a running an MKAL (mystery knit-a-long) for my first published knitted lace pattern, which is also my first published shawl pattern.  Corinthian Order is inspired by the Corinthian style columns of classical Greek architectureAlong with the Doric and the Ionian, it is one of the three classical Greek column styles, and the most elaborate.  Later Hellenistic styles often combined the simplicity and cleanliness of the Ionic order with the Corinthian to create a Composite order, which is also a choice in the pattern.  Pricing (free for the beginning!) and pattern information, including release info, is at the bottom of this blog post.

Pattern Logistics:
Shape: triangular, crescent, or rectangular (stole/scarf)
Body: lace or stockinette
Colour: solid or two-colour, one for the body (Clue 1) and one for the border (Clues 2 & 3)

Skill level: intermediate, but friendly to the adventurous beginner.  Clear "how-to shawl" instructions on the prologue, as well as blocking and lifelines (later clues)

Materials:
  • 500-700 yds fingering weight yarn (I am also testing a worsted as we speak)
  • 4 mm/US 6 needles or size to obtain flexible, open fabric in stockinette and lace
  • 6/0 seed beads, ~150-250, or you can use nupps or purl bumps instead.  These will only be used for the final clue
  •  2 stitch markers recommended on the triangular, to mark each side of the spine.  Particularly useful if you like to chug along mindlessly
Gauge: not important, so long as your fabric is flexible and open

Inspirational image for Corinthian Order.  Meyers Kleines Konversationslexikon. Fünfte, umgearbeitete und vermehrte Auflage. Bd. 1. Bibliographisches Institut, Leipzig und Wien 1892.  Public domain.
Scheduling:
Present: Prologue (yardage, bead counts, design choices and alternatives, some information on shawl structure for those new to shawls)
July 3, 2015: Clue 1 (main body, if two colours this is Colour A)
July 17, 2015: Clue 2 (border transition, if two colours use Colour B here and after)
July 31, 2015: Clue 3 (border)
August 14, 2015: We have built the temple columns: post all the spoilers you want!  Final pattern release with separate pdfs for triangular, crescent, and stole/scarf options, and a master pdf with all the options.


Pricing (USD):
now-July 17, 2015: free! (no coupon code, just add to cart).  For those without a Ravelry account, use buy now.  If you are a Raveler, go to the Ravelry pattern page and add to cart, then checkout.  This way the pattern is added to your library and you get all the updates.
July 17-30, 2015: $1.00 (USD)
July 31-August 14, 2015: $2.50
August 14, 2015: $3.50*

Inspiration:
The pattern actually came about because when working Ashton, I was determined to have the border of Annis along the bottom of the shawl.  Problem is, Ashton is a typical top-down triangular shawl, and Annis is a typical bottom-up crescent shawl.  I did my best to create a chart exactly like the Annis border, but going in the opposite direction, and didn't like the result it gave when worked.  It looked nothing like Annis, and it looked like the leaf lace I had just gotten tired of working after creating a leaf lace cowl, hat, and shawlette.  So I redesigned, changed elements, and ascribed different elements importance.  The chart and resulting pattern wind up looking very different from Annis, and only if you know that I was inspired by Annis can you see the similarities.

That still doesn't say how I decided to make this a whole new shawl.  

After blocking Ashton, I noticed when holding it up how very like cathedral spires or temple columns the border lace looked.  It was too Hellenistic to be a Gothic cathedral, and needed something MORE to be fully classical.  And I didn't want the clean, simplistic lines of the Doric and Ionian orders, no.  I instantly thought of the Corinthian style of columns.  So I changed up the elements of the design again to give strong lines to the spires, added pillars, and designed a whole new piece.  A whole new shawl, customizable due to repeat-friendly charts and easy stitches, of which the most complex is a centered double decrease.  Straightforward but will keep you on your toes!

MKAL Hosting and Sharing:
I don't have a Ravelry forum or group to host this in, but please feel free to comment here or on the pattern page for questions. You can also tag me on Twitter (@DeviousRose_) and use "#devroseMKAL" to share your progress and ask questions.  You can do the same on Facebook, and if you want to have your project photo considered for the pattern page, use "devroseMKAL" as a tag on your Ravelry project page so I can look it up when the MKAl is over.

Au revoir, and happy yarning!

*After a year and a day, on August 15, 2016 (because yay European folklore), the pattern will revert to be being free and remain that way for the foreseeable future.

Saturday, May 09, 2015

My Firsts: Fleeces and Supported Spindle by TheDancingGoats!

http://www.ravelry.com/people/NekoPeque/handspun/fleece-of-all-techniques-navajo-churro-17/  
Left: Flicked Churro locks, rolled up into faux rolags.   Right: Osage orange/hedge apple Russian spindle and vortex talking bowl from The Dancing Goats.  The spindle has some of the Churro fleece, spun from the lock, on it.

As the title suggests, I just got a hold of my first fleeces and my first supported spindle.  The fleeces were from The Spinning Loft and the spindle was a Russian compromise by Robin of The Dancing Goats.  I also got a beautiful custom spinning bowl with Tolkien-style runes reading "Listen to the quarters of the wind" inscribed along the sides.  Both were hedge apple/osage orange, with the spindle far lighter than the bowl.  The contrast is beautiful and the tools feel like magic in my hands, and even look like magic!  You can see them both in a listing here.  He's put up the bowl as a regular Talking Bowl as well.  Check it out. :)
 
Bowl close-up!

I discovered The Dancing Goats when I was looking up videos on Russian and Orenburg spindles.  I had no intention of buying one, because I wasn't interested in using one, just in their aesthetics and their traditional and historical use.  But I found his tutorial on spinning with a "compromise" Russian spindle, based on Russian spindles but with a hook.  They are also much bigger and when I looked up The Dancing Goats on Ravelry I saw people in love with their bowls, but very little information on their spindles.  A couple people mentioned the spindles looked huge and clunky, but the overall look and the hook enchanted me, so after a while I ordered one, then a customized "talking bowl" with Tolkien-style runes.  They both got there very quickly, about 3 days after the bowl was finished.  Actually, they arrived the same day my fleeces did!  I was super excited to work with the fleeces, so I washed them that day, and also super excited for my new spindle.
Freshly arrived spindle and support bowl!

Yes, it's big, but it's also very lightweight, and the bowl is far more beautiful than in the photo.  I've been spinning the Navajo Churro fleece using different techniques on it.  At first I had to do a lot of park-and-draft-type spinning, but I got the hang of it after a bit and I am in love with this spindle.  It's rivalling my love for my Miss Marple's Teacup from Greensleeves, plus it's super portable! I do intend to buy another, given how magical this spindle is and how in love I am with it.  I mean, just look at these spindles!  He's also got other compromise spindles in his shop- Tibetan and Southwest (based on the Navajo spindle), as well as drop spindles.  Some of the drop spindles run up to quite heavy, about 3.5 oz, great if you're plying or making bulky yarns, the latter of which I've found incredibly difficult on my 1.5 oz drop spindle.  There's also those beautiful spinning bowls, as well as wonderful woodworks.  Did I also mention that the woods for the bowls and the spindles are discards from cabinet making?  Love anything that makes use of recycling or using up every possible resource.
  
Left: Freshly washed Suffolk on the left half of the container, Navajo Churro on the right.   Right: The bowl and Russian spindle with the rest of the flicked locks

On the fleeces, I went and bought an Ashford flicker on a trip to a nearby LYS.  I was combing the Churro with a simple dog comb before, but this is...WOW.  Just wow.  I can see the advantages to both methods, of course, but for this fleece the flicker has done the rest!

Au revoir!

-Krystalle

Sunday, March 15, 2015

Phat Fiber Box: "C'est la vie" themed sampler box + North Star Alpacas review

Well, with my spinning/dying craze going strong, I managed to snag a Phat Fiber sampler box on my first try.  It will be a mixed box with both yarns and fibers, and I look forward to trying them and doing a "little review" type thing for the contributors once I get into their samples.  Speaking of which, I actually had never heard of Phat Fiber until I bought some amazing alpaca roving from North Star Alpacas a little over a month ago.  I first bought the cheapest thing I found- roughly 4 ounces of brown alpaca roving, priced low because it came from an older alpaca and the seller said it was rough for alpaca, similar to most sheep's wools.  But, having just got into spinning and wanting some luxury fibers without the pressure of "don't screw up, this cost a pretty penny," I purchased it anyway.  And I am glad I did.  It turned out to indeed be roving- I had read the difference between top and roving but not quite understood it until I opened my alpaca roving and saw how it differed from the merino and colonial tops I had been working with.
 
Left: unopened package.  Right: Dyed, spun-up yarn.  You can't really see it on camera- I tried- but it has a nice mottled purple look.

Plus, it came with a little moth-deterrent sachet and a sample of alpaca-tussah silk fiber!  I spun that first and loved it.  I have no idea why people said spinning alpaca was a nightmare, once I figured out it needed more twist that little darling spun itself!
Left: one of the alpaca-tussah sample fibres.  Right:  I'm making a two-single ball to ply from.

I'm in the plying stage of that baby, as you can see.  I'm spinning the brown alpaca and playing with dying it.  It took dye surprisingly well, and it is a little rough, but it only has had 2 or 3 flecks of vegetable matter total despite what the seller said.  And, due to that lovely freebie I immediately overcame my trepidation and bought some truly soft charcoal grey alpaca roving from her shop only 3 days later.  Let me tell you, that roving was SOFT.  And came with more alpaca-tussah fiber, but I did not weight it.  I think the total sample mass was about 1/2 ounce or so.  The grey roving took purple food dye VERY WELL and very evenly, which given what I've read about purple food dye for fiber surprised me.  I expected more of what I got with the brown alpaca, but I got this:
Left: the whole 4 ounces of roving.  Right: The grey roving dyed purple.  Hard to capture, but I promise it's a lovely stormy colour.

So, I loved the purchases I made here.  Do keep in mind however, that the listing photos are not super accurate of the product you get: they are a little washed out.  The brown and grey rovings I got are both very rich, deep colours.  The alpaca-tussah sample does look closer to the listing photo, but more pink in real life.

Anyway, summary points of North Star Alpacas:
  • fast shipping: both days I got the shipping notification only an hour after ordering
  • excellent packaging: fiber not matted or pressed too much, plus little freebie and moth-deterrent sachet
  • caring seller, communicates well to customers
  • photos belie the rich colour quality of the product
  • introduced me to Phat Fiber with the "thank you for buying" message!
  • Will buy again, whenever I need alpaca!  I'm already eyeing the fleeces in her shop!
As for the first spindle shown, it came from Spinerosity and was very affordable, I will post a review soon.  The second came from a local vendor who sells across the United States, Brookmore Creations.  While I was adverse to the flower shape at first, it proved a good place for holding the yarn, not expensive, and a good beginner spindle for me.

Au revoir!

Tuesday, February 10, 2015

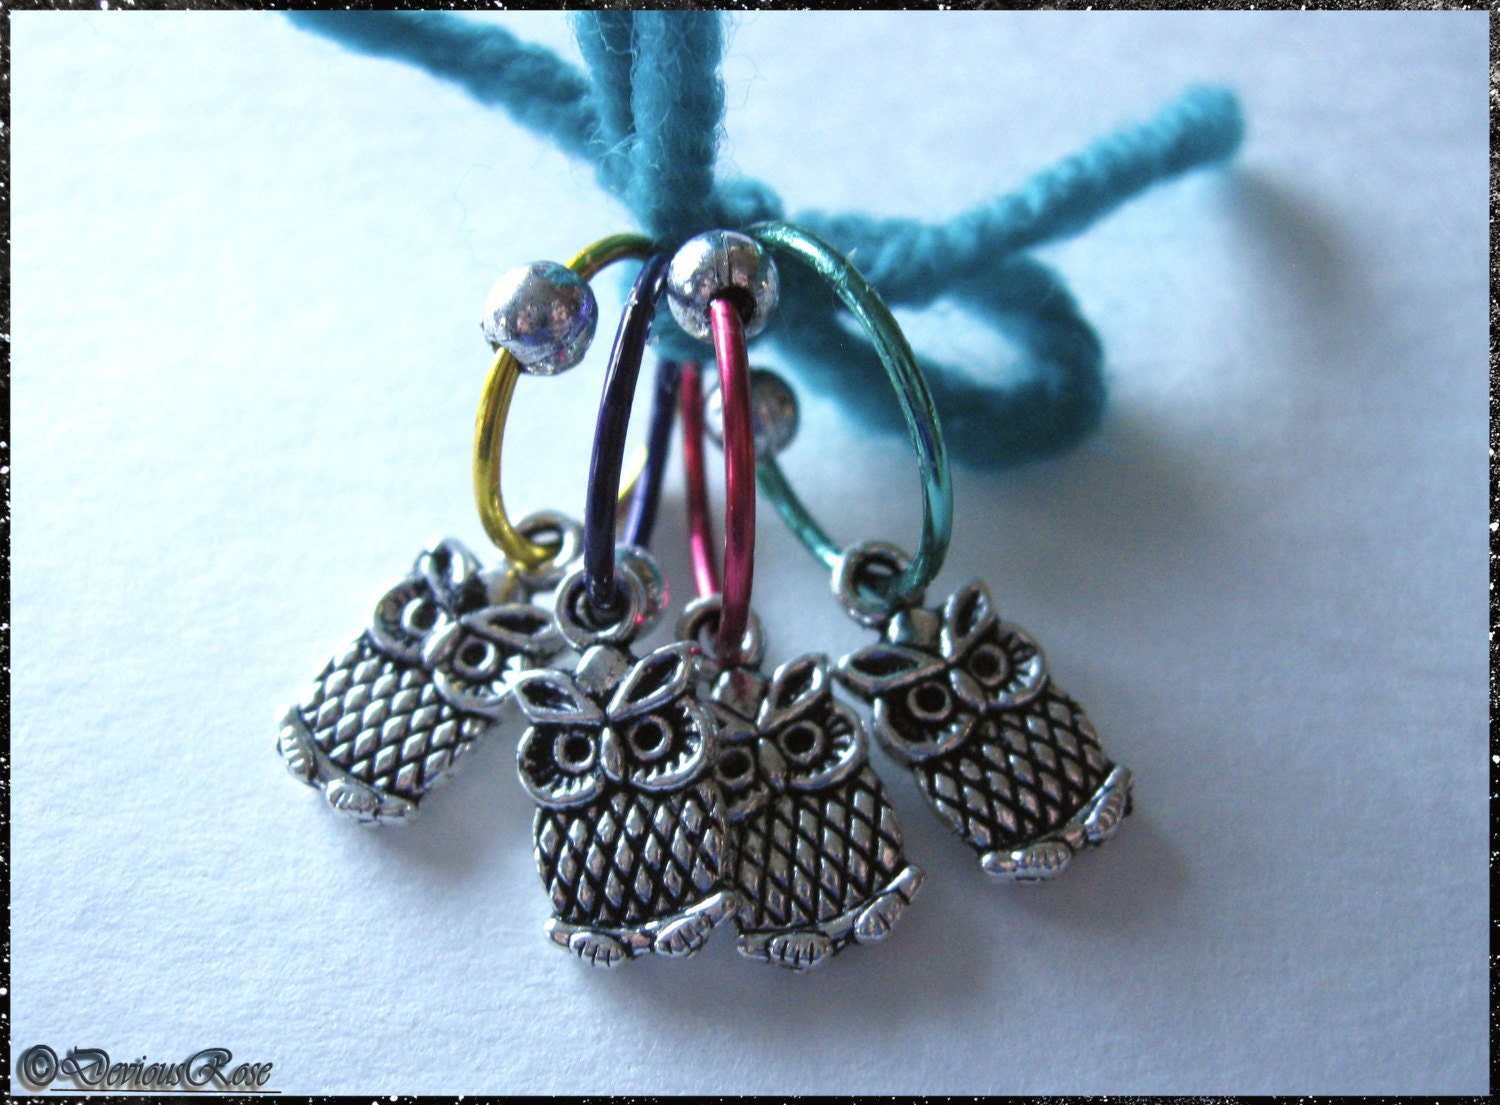
Owlie Stitch Markers and Valentine's Day Sale!

https://www.etsy.com/listing/221946497/4-dangly-owl-jumbo-stitch-markers-12-mm
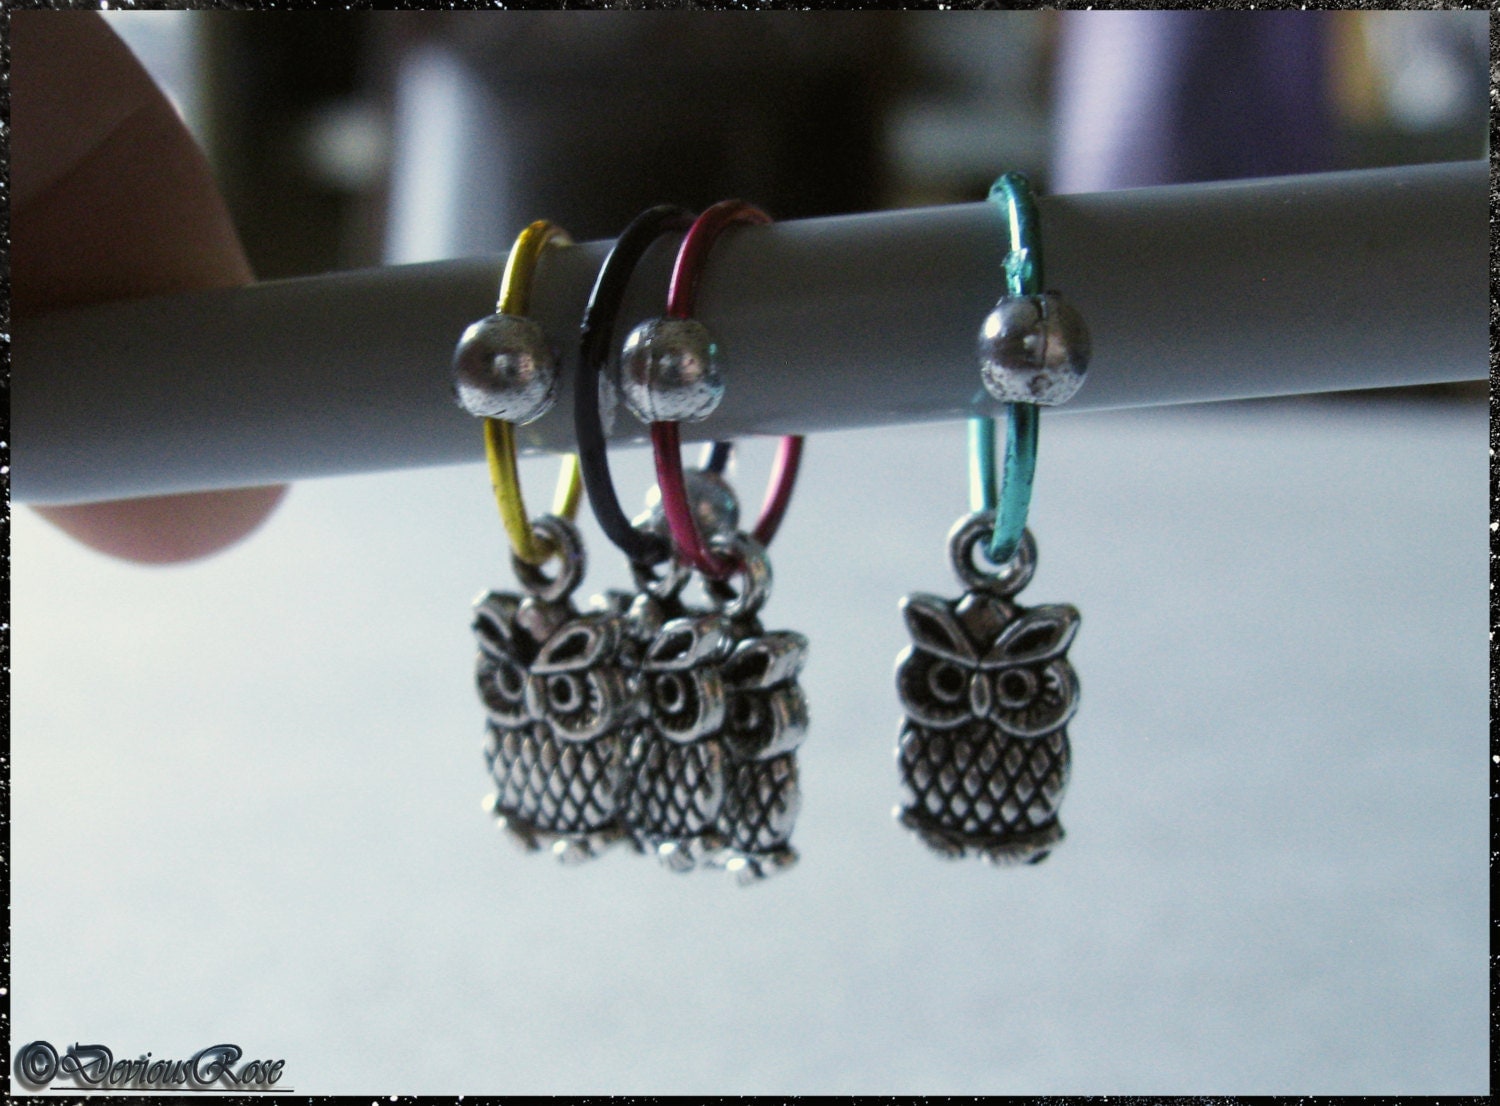
I've just entered these cute little owl stitch markets into my Etsy shop.  They are large, 12 mm stitch markers that can fit up to a US 17/12 mm needle.  The picture below shows them on a US 11/ 8 mm knitting needle, so you get an idea of how well they work for chunky and bulky knits. 


They also work equally well on smaller needles- I used a similar pair successfully on US 8/ 5 mm needles with sport weight yarn and knitting went beautifully. 


Oh, and the sale- enter "ART01" into your Etsy checkout cart for 10% off until Valentine's Day this Saturday. :)

Happy arting!